

There’s something quietly magical about a bouquet that refuses to fade. Whether it’s the roses from your wedding day, sunflowers from a summer garden, or a handful of wildflowers picked on a country walk — dried flowers hold memories in a way that fresh ones simply can’t.
Flower preservation has quietly become one of the most beloved DIY trends of the decade. Home decorators, wedding planners, crafters, and gift-givers are all turning to dried botanicals for their timeless beauty, low maintenance, and sustainability. And the best part? You don’t need a professional studio or expensive equipment to do it well.
This guide will walk you through everything you need to know — from choosing the right flowers to mastering five proven drying methods that actually preserve color, shape, and charm.
Why Dried Flowers Are Trending Right Now
Dried flowers have had a serious revival, and it’s not hard to see why. They’re beautiful, long-lasting, eco-conscious, and endlessly versatile.
Interior design trends have shifted toward natural textures, earthy tones, and organic materials. Dried pampas grass, preserved lavender bundles, and pressed wildflowers fit perfectly into this aesthetic — and they cost a fraction of what fresh arrangements do.
On social platforms like Pinterest and Instagram, dried flower content consistently performs well. Flat-lay arrangements, boho wedding bouquets, and framed pressed flowers rack up thousands of saves every week.
Beyond aesthetics, dried flowers carry sentimental value. Preserving a funeral tribute, a birthday bouquet, or a garden harvest connects you to a moment in time. That’s something no store-bought decor can replicate.
Best Flowers for Drying at Home
Not all flowers dry equally well. Some shrivel, some lose color dramatically, and some turn brittle and brown. Choosing the right varieties from the start makes everything easier.
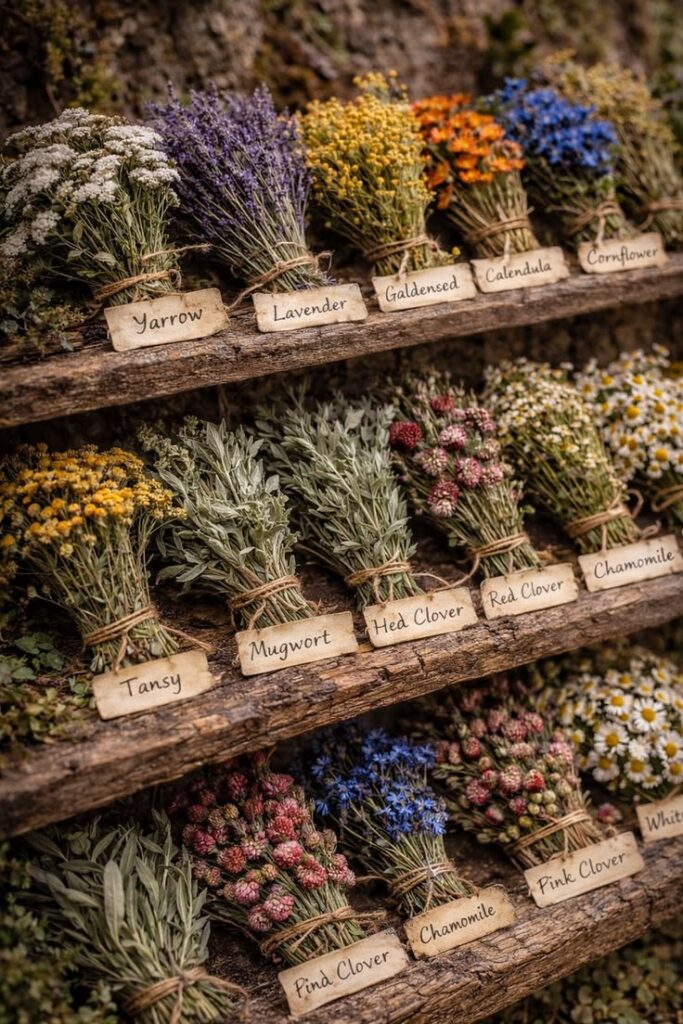
Best flowers for drying:
- Lavender — dries beautifully, retains fragrance and color
- Roses — excellent for all methods; deep colors hold well
- Statice — one of the easiest, keeps shape and color almost perfectly
- Baby’s Breath — lightweight and dries quickly
- Strawflowers (Helichrysum) — papery petals that barely change after drying
- Hydrangeas — dry with stunning volume when handled carefully
- Eucalyptus — flexible even when dry, perfect for wreaths and garlands
- Peonies — require careful handling but reward with breathtaking results
- Yarrow — flat flower heads dry flat and evenly
- Chamomile — small but charming, great for pressed art
Harvest flowers just before they reach full bloom. A flower that’s slightly under-opened will dry with better shape and more vivid color than one that’s already beginning to drop petals.
Common Mistakes That Ruin Flower Color During Drying
Even with the best intentions, a few easy-to-make mistakes can turn your beautiful blooms into dull, brown disappointments.
Waiting too long to start: The fresher the flower, the better the result. Start the drying process within one to two days of cutting.
Using wet or humid flowers: Moisture is the enemy of color. Always pat flowers dry before beginning any drying method. Avoid drying during rainy or very humid days.
Skipping the dark room: Sunlight bleaches dried flowers quickly. Always dry and store them away from direct light — a closet, cupboard, or shaded room works well.
Overcrowding the flowers: Whether you’re hanging, pressing, or using silica gel, give flowers space. Touching flowers can cause mold, uneven drying, and crushed petals.
Rushing the process: Impatience leads to half-dried flowers that mold or collapse. Trust the timeline for each method.
5 DIY Flower Drying Methods That Actually Work
Method 1: Air Drying Flowers
How It Works
Air drying is the oldest, simplest, and most beginner-friendly method. You bundle the flowers loosely, hang them upside down, and let time and airflow do the work. It’s low-effort, low-cost, and surprisingly effective for many varieties.
Best Flowers for Air Drying
Lavender, roses, statice, baby’s breath, and yarrow all respond beautifully. Avoid delicate, moisture-heavy flowers like tulips or gardenias — they tend to wilt before they dry.
Step-by-Step Instructions
- Cut stems at an angle, leaving at least 6–8 inches of stem.
- Remove all leaves (they hold moisture and slow drying).
- Group flowers into small bundles of 5–10 stems, secured with a rubber band or twine.
- Hang upside down in a warm, dry, well-ventilated space out of direct sunlight.
- Leave undisturbed for 2–4 weeks.
Drying Time
Two to four weeks, depending on flower type and humidity levels in your home.
Pros and Cons
Pros: Zero cost, completely hands-off, works for large quantities. Cons: Longer drying time, colors may fade slightly compared to faster methods, humidity-sensitive.
Color-Preservation Tips
Choose flowers with naturally vibrant pigments — dark purples, deep reds, and warm yellows hold up best. Dry them in a room with a dehumidifier running in the background during summer months for noticeably better results.
Method 2: Silica Gel Drying
How It Works
Silica gel is a desiccant — it absorbs moisture from whatever it surrounds. When you bury flowers in silica gel crystals, the gel pulls water from the petals quickly and gently, leaving the flower almost perfectly preserved in shape and color.
This is hands-down the best method for color retention.
Best Flowers for Silica Gel
Roses, peonies, dahlias, zinnias, marigolds, and any flower you want to preserve as close to its fresh appearance as possible.
Step-by-Step Instructions
- Pour a 1-inch layer of silica gel into an airtight container.
- Trim flower stems short (about 1 inch) and place blooms face-up on the gel.
- Carefully spoon more silica gel around and over the petals until completely covered.
- Seal the container tightly and leave undisturbed.
- Check after 3–5 days. Petals should feel dry and papery — not stiff or crunchy.
- Gently remove, brush away excess crystals with a soft brush.
Drying Time
Three to seven days for most flowers.
Pros and Cons
Pros: Exceptional color and shape preservation, reusable gel (just dry it in the oven to restore), works on delicate varieties. Cons: Silica gel costs money upfront, flowers become brittle and fragile after drying.
Color-Preservation Tips
After removing flowers from the gel, seal them with a light coat of floral sealant spray. This adds a protective layer that dramatically slows color fading and helps petals hold together.
Method 3: Pressed Flower Method
How It Works
Pressing flowers between absorbent materials under weight flattens them into beautiful, translucent specimens. Pressed flowers are perfect for framed art, greeting cards, resin jewelry, bookmarks, and home decor.
Best Flowers for Pressing
Flat or single-layer flowers work best — pansies, violas, daisies, ferns, wildflowers, lavender sprigs, and clematis. Thick or multi-layered flowers like roses press more slowly and can mold if not done carefully.
Step-by-Step Instructions
- Pick flowers on a dry day and allow any surface moisture to evaporate for an hour.
- Open a heavy book and line the pages with sheets of parchment or blotting paper.
- Arrange flowers face-down on the paper, leaving space between each one.
- Cover with another sheet of paper, then close the book.
- Stack additional heavy books on top for extra pressure.
- Wait 2–4 weeks, changing the paper halfway through if it feels damp.
Upgrade option: Use a dedicated flower press with wooden boards and wing nuts for more even pressure and faster results.
Drying Time
Two to four weeks in a book. One to two weeks with a flower press.
Pros and Cons
Pros: Beautiful results, endless creative uses, very low cost. Cons: Works only for flat flowers, takes patience, results are fragile.
Color-Preservation Tips
Press flowers as fresh as possible, before petals begin to yellow or brown. Once pressed and dried, store between sheets of acid-free paper in a cool, dark drawer. Exposure to humidity will cause colors to brown faster.
Method 4: Microwave Flower Drying
How It Works
The microwave method uses short bursts of heat to rapidly evaporate moisture from flower petals. It’s the fastest DIY method available and works surprisingly well for smaller flowers and those needed quickly.
This method is particularly popular for same-day results — ideal when you’re working on a time-sensitive project.
Best Flowers for Microwave Drying
Roses, zinnias, strawflowers, and compact blooms. Avoid very delicate or thin-petaled flowers — they can scorch or collapse.
Step-by-Step Instructions
- Fill a microwave-safe container with 2–3 inches of silica gel.
- Place flower(s) face-up in the gel, then gently cover completely.
- Place an uncovered cup of water in the microwave alongside the container (this prevents over-drying).
- Microwave on low or medium power for 2–3 minutes.
- Let cool with the lid slightly ajar for 24 hours before removing.
- Brush off gel crystals gently with a soft brush.
Drying Time
One to two days total (including the 24-hour cooling period).
Pros and Cons
Pros: Fastest method, good color retention, convenient for small batches. Cons: Risk of scorching, not ideal for large or delicate flowers, requires silica gel.
Color-Preservation Tips
Start with the lowest power setting and check frequently. Every microwave is different — what works in two minutes for one machine might need three in another. Err on the side of less time and add more if needed.
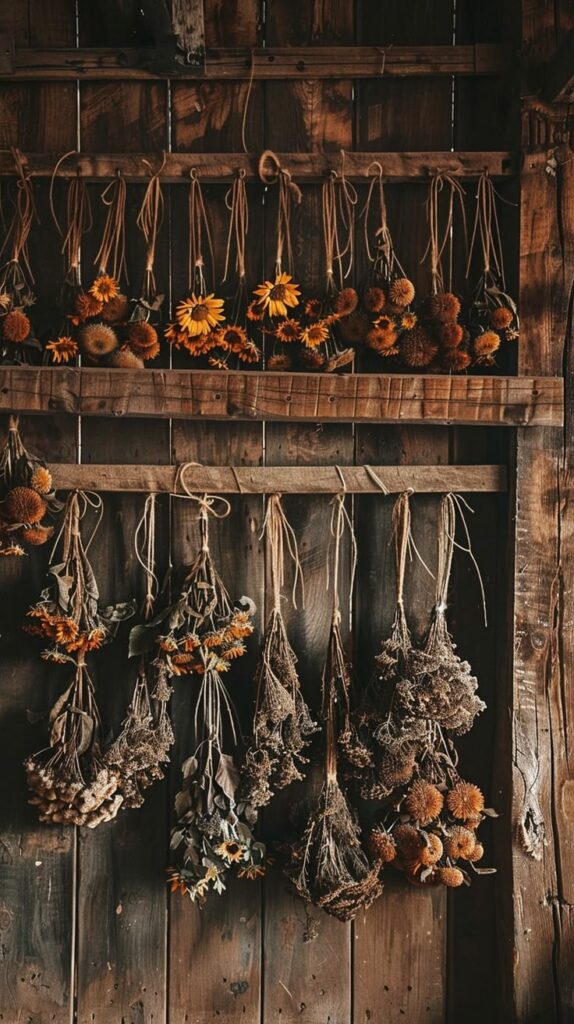
Method 5: Hanging Flowers Upside Down
How It Works
Similar to air drying but with intentional presentation built in, this method involves hanging flowers upside down in decorative bundles — often displayed on a wall hook, beam, or wooden rod while they dry.
The upside-down position helps stems stay straight and petals hold their shape as gravity works with the drying process.
Best Flowers for Hanging
Roses, lavender, eucalyptus, pampas grass, statice, and dried grasses. This method works beautifully for anything with a sturdy stem.
Step-by-Step Instructions
- Select fresh flowers and remove lower leaves.
- Gather into loose bundles — no more than 8–10 stems per bunch.
- Secure tightly with a rubber band or twine at the base of the stems.
- Hang from a hook, rod, or clothesline in a dry, warm, ventilated space.
- Allow to hang undisturbed for 2–4 weeks until completely dried.
Drying Time
Two to four weeks.
Pros and Cons
Pros: Decorative while drying, no supplies needed, creates a warm farmhouse or boho aesthetic in any room. Cons: Longer wait time, colors may fade slightly in bright rooms.
Color-Preservation Tips
Hang in a room with diffused natural light rather than direct sun. A laundry room, hallway, or spare bedroom is ideal. The darker and drier the space, the better the color holds.
Quick Tips for Better Results Every Time
- Always start with fresh, undamaged blooms.
- Cut stems early in the morning when flowers are most hydrated.
- Strip all leaves before drying to prevent mold.
- Avoid drying in kitchens or bathrooms where steam and humidity linger.
- Once dried, store in a cool, dark place when not on display.
- Use hairspray or floral sealant spray to lock in color and reduce brittleness.
- Keep dried flowers away from vents, fans, and drafty windows.
How to Keep Dried Flowers From Fading
Preserving color doesn’t end when the drying process does. Ongoing care makes a real difference in how long your dried flowers stay vibrant.
Keep them out of direct sunlight: UV rays are the number-one enemy of dried flower color. Even a few weeks near a sunny window can bleach a beautifully preserved bouquet.
Control humidity: High humidity causes dried flowers to reabsorb moisture, which leads to drooping, molding, and color loss. If you live somewhere humid, a small dehumidifier in the display room helps.
Use a floral sealant: Products like Mod Podge Spray Sealer or dedicated floral sprays create a thin protective coat over petals, locking in color and adding slight rigidity. Apply lightly from at least 12 inches away and allow to dry fully.
Dust gently: Use a very soft makeup brush or a can of compressed air to remove dust without breaking fragile petals. Never use water or a damp cloth.
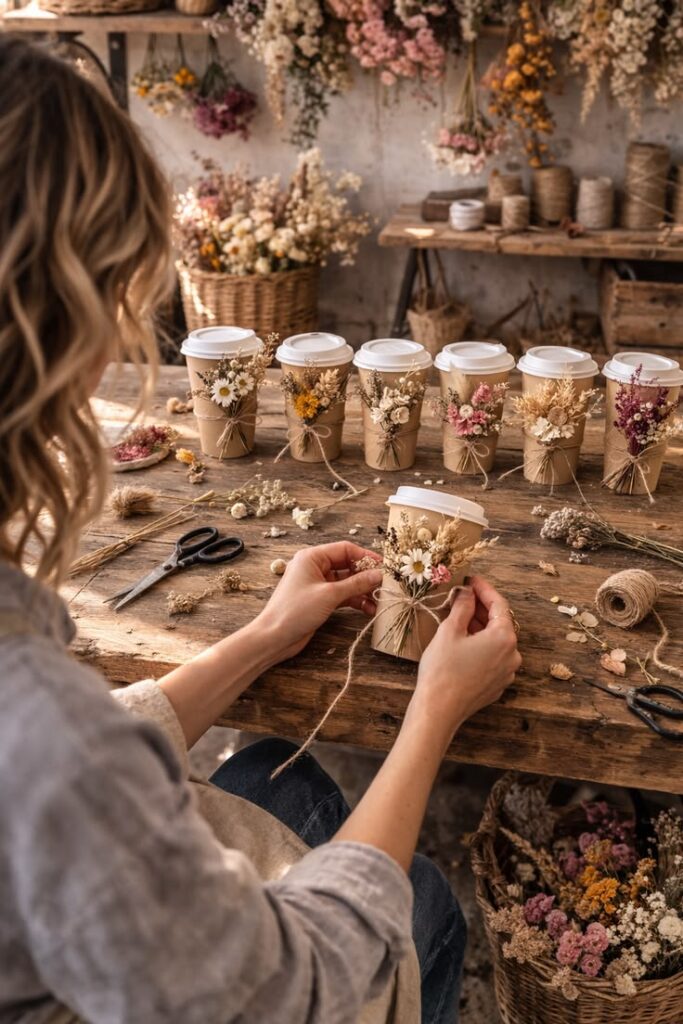
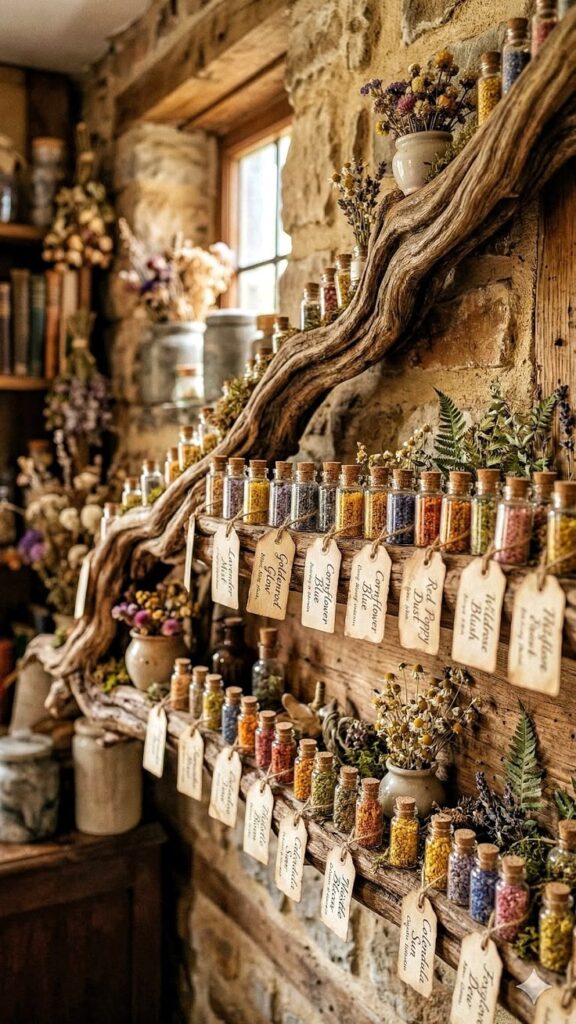
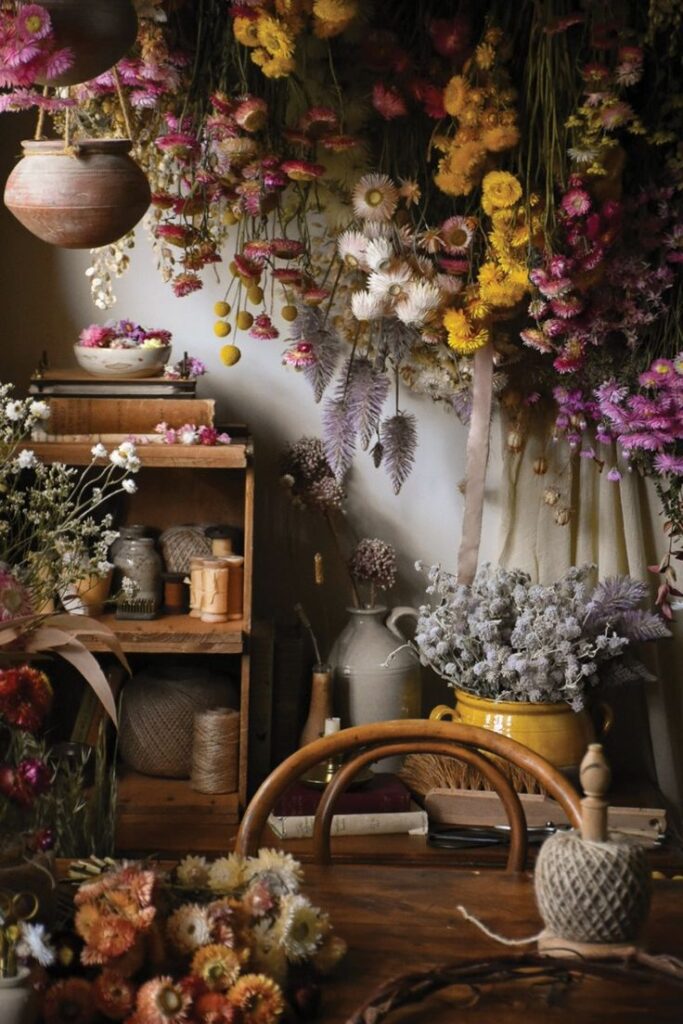
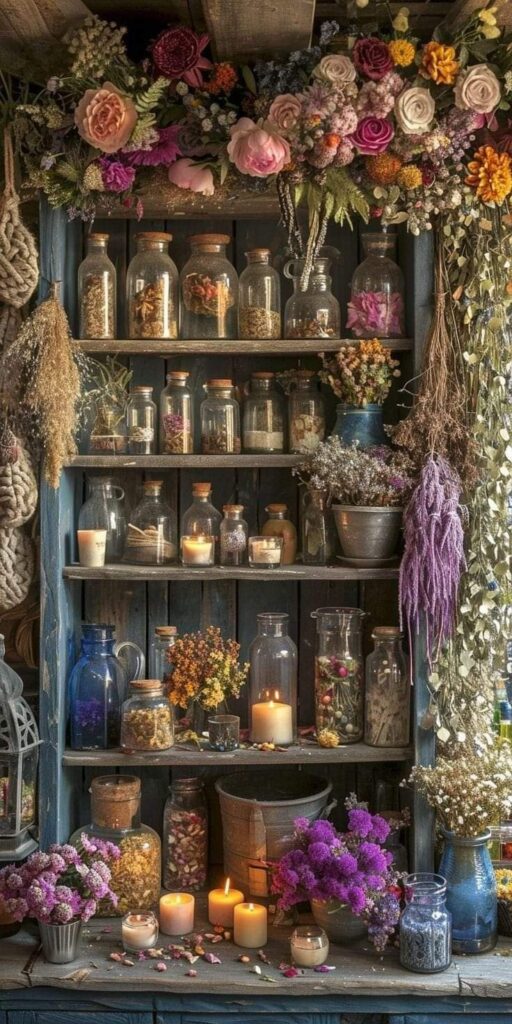
Styling and Decor Ideas Using Dried Flowers
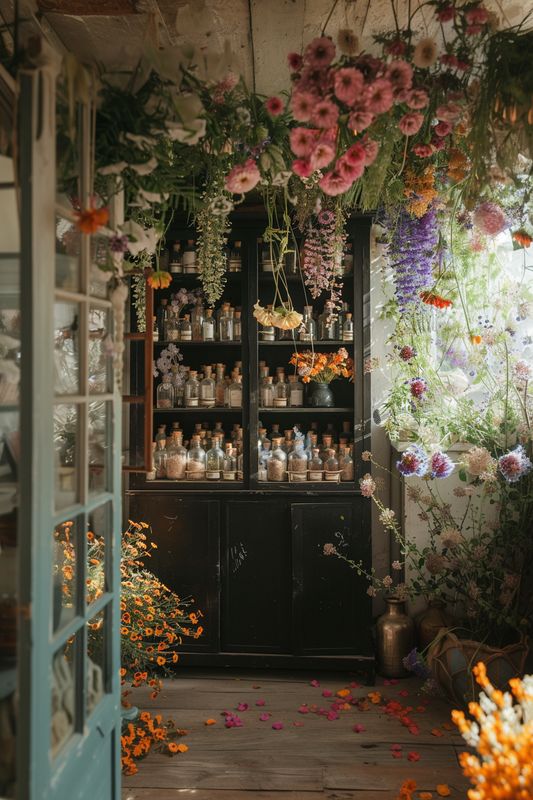
Once you’ve successfully dried your flowers, the real fun begins. Dried botanicals are incredibly versatile and can elevate almost any space in your home.
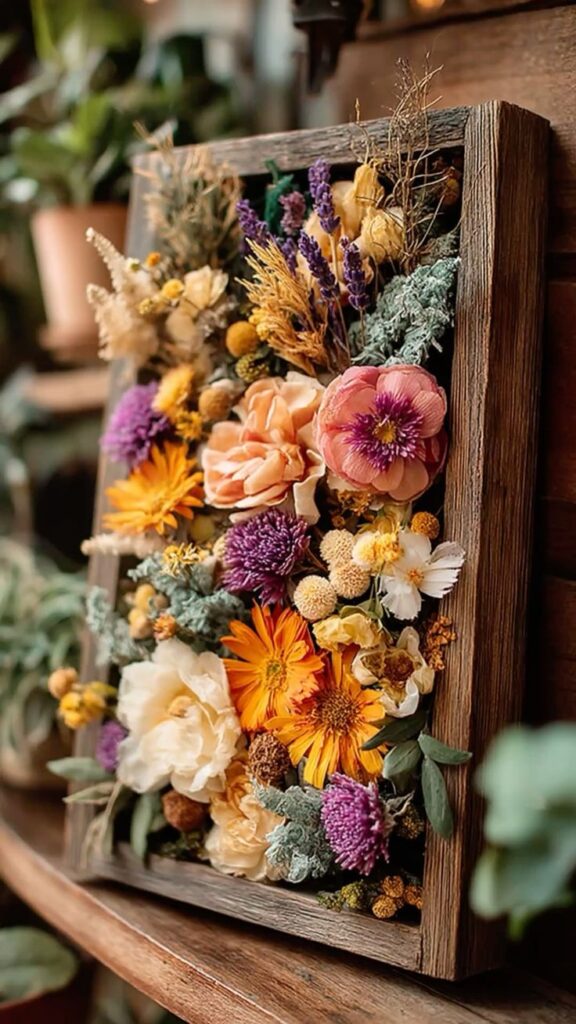
Framed pressed flower art: It is one of the most popular and striking ways to display preserved blooms. Arrange pressed pansies, ferns, and wildflowers in a grid on white card stock, frame them together, and you have a gallery wall piece that lasts for years.
Dried flower wreaths: It made from eucalyptus, dried roses, lavender, and pampas grass create a stunning front door statement that’s on-trend year-round.
Dried bouquet vases: They are effortless. Simply arrange your dried stems in a vintage ceramic jug, terracotta pot, or woven basket and display on a shelf, mantle, or side table. If you’re decorating around a fireplace, dried flower arrangements pair beautifully with layered textures and warm tones — the kind of cozy, layered aesthetic you often see in gas fireplace inspiration.
Dried flower candles and resin: They are a more advanced craft, but gorgeous. Press small flowers into candle wax or pour them into clear resin for keepsake paperweights and jewelry.
Table centrepieces: Using dried flowers in low vases or scattered alongside pillar candles make for elegant, zero-maintenance table styling that works for weddings, dinner parties, and everyday home decor. For a modern home setting, dried arrangements work particularly well alongside sleek, contemporary design elements — similar to the curated look found in modern fireplace decorating ideas.
Frequently Asked Questions
How long do dried flowers last?
With proper care, dried flowers can last anywhere from one to three years. Flowers dried with silica gel and sealed with floral sealant tend to last longer than air-dried varieties.
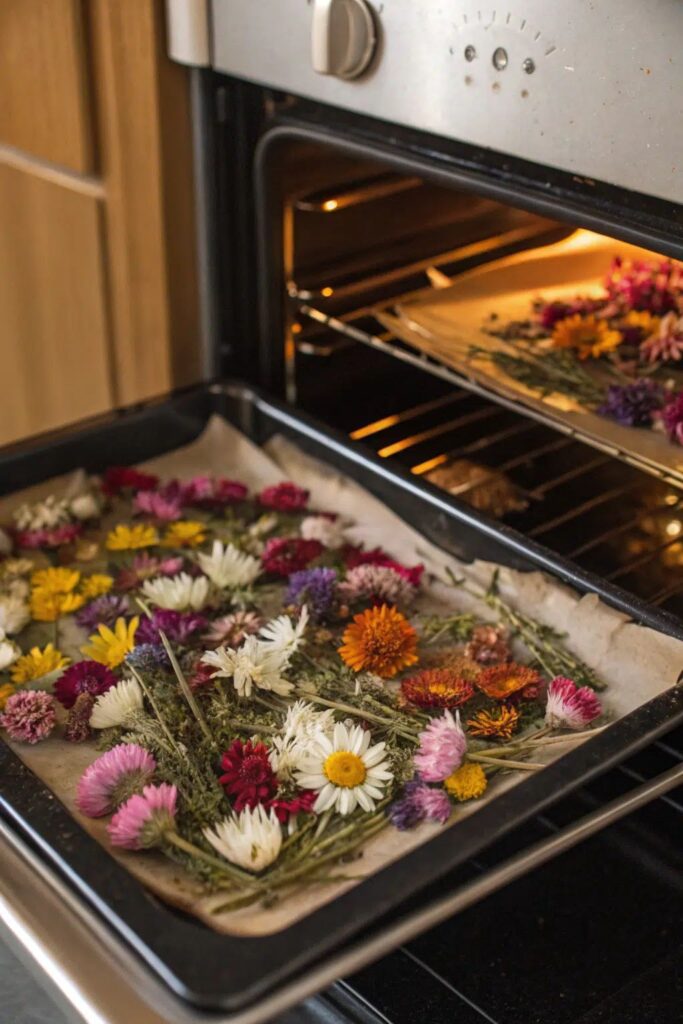
Can you dry flowers in the oven?
Yes, though it requires careful temperature control. Set your oven to its lowest setting (around 100–120°F / 40–50°C), place flowers on a baking sheet lined with parchment, and check every 30 minutes. It takes 1–3 hours but results are decent for sturdy flowers.
Why do my dried flowers keep turning brown?
Browning usually means the flowers were past their prime when drying began, or they’ve been exposed to too much light or moisture afterward. Use fresh flowers, dry them away from sunlight, and store in a dry environment.
Can I use dried flowers in resin? Absolutely. Make sure flowers are completely dried before embedding in resin — any remaining moisture will cause cloudiness or mold inside the resin cast.
Do dried flowers smell?
Some varieties retain fragrance beautifully — lavender is the most well-known example. Others lose most of their scent during drying. You can lightly mist dried bouquets with essential oils to refresh or add fragrance.
Are dried flowers safe for pets?
Some dried flowers and plants can be toxic to cats and dogs, including lavender, eucalyptus, and certain dried herbs. Always check a pet-safe plant list and keep arrangements out of reach of animals.
Conclusion: Your Home, Your Garden, Beautifully Preserved
Drying flowers at home is one of those skills that sounds complicated until you actually try it — and then you wonder why you waited so long to start.
Whether you choose the simplicity of hanging lavender in a sunny hallway, the precision of silica gel for a treasured wedding rose, or the creative joy of pressing wildflowers for a framed art piece, every method brings its own kind of magic.
The flowers you dry today become the memories you hold onto for years. A pressed daisy from a summer walk, a dried rose from a milestone bouquet, a bunch of lavender from your first garden — these aren’t just decorations. They’re stories.
Start small. Pick a single stem. Try one method. See how it feels. Then try another. Before long, you’ll have a collection of beautifully preserved botanicals that bring warmth, texture, and life to every corner of your home — without a single drop of water needed.
Your flowers deserve to last. And now, with these five proven methods, they finally can.


